Disclaimer: As an Amazon Associate, I earn commission from qualifying purchases.
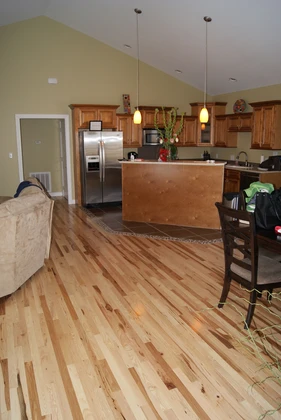
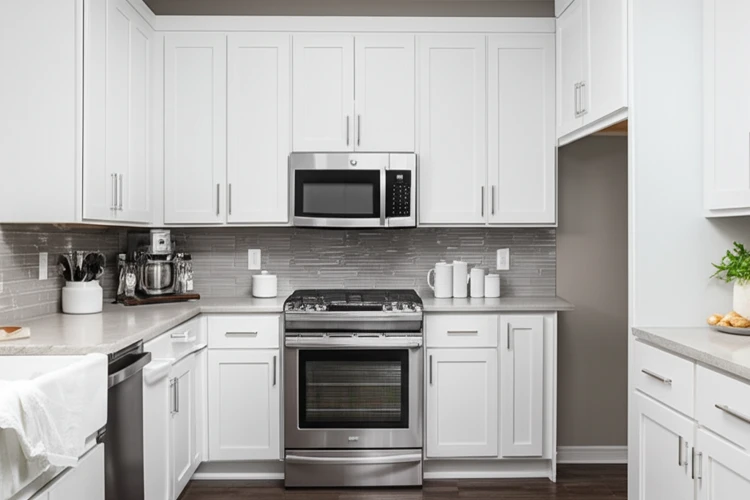
Kitchen countertops are the unsung heroes of any home, bearing the brunt of daily use from cooking to cleaning. Unfortunately, even the most durable laminate countertops can suffer from wear and tear, resulting in chips, scratches, and peeling. For homeowners and renters alike, learning how to repair kitchen countertop laminate is not just a cost-effective solution but also a practical skill that can greatly extend the lifespan of their kitchen surfaces.
With over a decade of experience in home improvement, I have seen firsthand how these repairs can transform a kitchen.
Common Issues with Kitchen Countertop Laminate
Kitchen countertop laminate is susceptible to various issues, including peeling edges, burn marks, scratches, and water damage. These problems are often reported by homeowners in reputable home improvement forums and publications. Peeling edges, for instance, are commonly caused by moisture seeping into the laminate, leading to delamination.
Burn marks can occur from placing hot pots or pans directly on the surface, while scratches are often the result of using sharp objects without a cutting board. Water damage, on the other hand, can lead to bubbling and warping of the laminate.
Tools and Materials Needed for Repair
Repairing kitchen countertop laminate requires a specific set of tools and materials. Here’s a comprehensive list:
- Laminate repair kit
- Putty knife
- Fine-grit sandpaper (220-grit)
- Sealant (specifically for laminate)
- Contact cement
- Clamps
- Cleaning solution (mild detergent)
- Soft cloth or sponge
- Masking tape
Industry professionals often recommend brands like Wilsonart or Formica for laminate repair kits, as they are known for their durability and ease of use.
Preparation Steps Before Starting the Repair
Before starting the repair process, it’s essential to prepare the work area properly.
- Clean the Countertop: Use a mild detergent and a soft cloth or sponge to clean the countertop thoroughly. This step removes any dirt, grease, or debris that could interfere with the repair process.
- Remove Debris: Ensure any loose or damaged laminate is removed. Use a putty knife to gently scrape away any debris.
- Ensure Proper Ventilation: According to OSHA guidelines, proper ventilation is crucial when working with adhesives and sealants. Open windows or use a ventilation fan to maintain airflow.
- Gather Tools and Materials: Have all necessary tools and materials within reach to avoid interruptions during the repair process.
Fixing Minor Scratches and Chips
Repairing minor scratches and chips can significantly improve the appearance of your countertop. Here’s a step-by-step guide:
- Clean the Area: Use a mild detergent to clean the area around the scratch or chip.
- Sand the Surface: Lightly sand the damaged area with fine-grit sandpaper to create a smooth surface for the repair kit to adhere to.
- Apply the Repair Kit: Follow the instructions on the laminate repair kit to fill in the scratch or chip. Use a putty knife to spread the filler evenly.
- Smooth the Surface: Once the filler has dried, lightly sand the area again to ensure a smooth finish.
- Seal the Repair: Apply a laminate sealant to protect the repaired area and prevent future damage.
Using before-and-after images, you can see the dramatic improvement that can be achieved with these steps. Techniques from professional repair guides emphasize the importance of precision and patience during this process.
Repairing Peeling Edges
Peeling edges can be more challenging to repair but are manageable with the right approach.
- Clean the Area: Clean the peeling edge with a mild detergent.
- Apply Contact Cement: Use a brush to apply contact cement to both the peeling edge and the underlying surface. Allow the cement to dry until it becomes tacky.
- Reattach the Edge: Press the peeling edge firmly back into place and use clamps to hold it securely. Allow the cement to cure according to the manufacturer’s instructions.
- Sand and Seal: Once the cement has cured, lightly sand the area and apply a laminate sealant to protect the repair.
Professional kitchen remodelers often use this method to ensure a durable and long-lasting repair.
Addressing Burn Marks
Burn marks can be particularly unsightly and require careful handling.
- Sand the Burn Mark: Use fine-grit sandpaper to lightly sand the burn mark. This helps to remove the discolored area and prepare the surface for repair.
- Apply a Repair Kit: Use a laminate repair kit to fill in any depressions caused by the burn. Follow the kit’s instructions for application.
- Seal the Repair: Apply a laminate sealant to protect the repaired area and prevent future damage.
Academic studies and industry reports suggest that using fine-grit sandpaper is often more effective than chemical solutions, as it provides a smoother finish and better adhesion for the repair kit.
Dealing with Water Damage
Water damage can be one of the most challenging issues to address, but it’s not impossible.
- Identify the Damage: Look for signs of bubbling, warping, or discoloration that indicate water damage.
- Dry the Area: Use a hairdryer or heat lamp to dry the affected area thoroughly. Ensure proper ventilation to prevent moisture buildup.
- Remove Damaged Laminate: Use a putty knife to gently scrape away any damaged or loose laminate.
- Apply Contact Cement: Use contact cement to reattach any peeling edges and seal the area.
- Seal the Repair: Apply a laminate sealant to protect the repaired area from future water damage.
Water damage restoration experts recommend using a hairdryer on the lowest heat setting to avoid further damage to the laminate.
Tips for Preventing Future Damage
Preventing future damage to your laminate countertop is crucial for maintaining its longevity.
- Use Cutting Boards: Always use a cutting board to avoid scratches from sharp objects.
- Avoid Hot Pans: Never place hot pans or pots directly on the countertop. Use trivets or hot pads instead.
- Clean Spills Immediately: Clean up any spills, especially liquids, as soon as they occur to prevent water damage.
- Regular Maintenance: Periodically inspect your countertop for signs of wear and address any issues promptly.
Reputable home improvement publications often stress the importance of these preventive measures to keep your countertop in pristine condition.
Best Practices for Cleaning Laminate Countertops
Proper cleaning is essential for maintaining the appearance and durability of your laminate countertop.
- Use Mild Detergents: Avoid harsh chemicals and abrasive cleaners. Opt for mild detergents and warm water instead.
- Soft Cloths: Use soft cloths or sponges to clean the surface gently.
- Avoid Abrasive Tools: Do not use steel wool or scrubbing pads, as they can scratch the laminate.
- Rinse Thoroughly: Always rinse the countertop thoroughly after cleaning to remove any residue.
- Dry Completely: Dry the countertop completely to prevent water spots and potential water damage.
Cleaning standards from health and safety organizations emphasize the importance of using gentle cleaning solutions to avoid damaging the laminate.
When to Consider Professional Help
While many repairs can be handled by homeowners, there are scenarios where professional help may be necessary.
- Extensive Damage: If the damage is extensive or affects a large area, professional intervention may be required.
- Complex Repairs: For complex repairs, such as replacing large sections of laminate, a professional can ensure a seamless finish.
- Time Constraints: If you lack the time or tools to complete the repair, hiring a professional can save you both time and effort.
Professional repair services offer benefits such as expertise, specialized tools, and a guarantee on their work, ensuring a high-quality repair.
DIY vs. Professional Repair: Cost Comparison
Comparing the costs of DIY repair versus hiring a professional can help you make an informed decision.
- DIY Costs: The cost of DIY repair includes the materials and tools needed, which can range from $20 to $100 depending on the extent of the damage.
- Professional Costs: Hiring a professional can cost between $150 to $500 or more, depending on the complexity of the repair and the size of the area affected.
- Long-Term Savings: While DIY may be more cost-effective initially, professional repairs often come with a guarantee, ensuring long-term savings and peace of mind.
Industry reports and cost analyses suggest that while DIY can be cost-effective for minor repairs, professional help is often more reliable for extensive or complex issues.
Frequently Asked Questions (FAQs)
How long does it take to repair kitchen countertop laminate?
The time required to repair kitchen countertop laminate depends on the extent of the damage. Minor scratches and chips can be repaired in as little as 30 minutes to an hour, while more extensive repairs, such as peeling edges or water damage, may take several hours to complete.
Can I use a hairdryer to speed up the drying process?
Yes, using a hairdryer on the lowest heat setting can help speed up the drying process for water-damaged areas. However, it’s essential to ensure proper ventilation to prevent moisture buildup. Be cautious not to overheat the laminate, as this can cause further damage.
What is the best sealant for kitchen countertop laminate?
The best sealant for kitchen countertop laminate is one specifically designed for laminate surfaces. Brands like Wilsonart and Formica offer high-quality sealants that provide a durable and long-lasting finish. Look for sealants that are water-resistant and easy to apply.
Can I repair laminate countertops myself if I have no experience?
Yes, you can repair laminate countertops yourself even if you have no experience. With the right tools, materials, and a step-by-step guide, many minor repairs can be handled by homeowners. However, for more complex repairs, it may be beneficial to consult a professional.
How often should I reseal my laminate countertop?
Resealing your laminate countertop depends on the level of use and wear it experiences. As a general guideline, resealing every 1-2 years can help maintain the countertop’s durability and appearance. Regular inspections can help determine if more frequent resealing is necessary.
Conclusion
Repairing kitchen countertop laminate is a valuable skill for any homeowner or renter. By addressing common issues such as scratches, chips, peeling edges, burn marks, and water damage, you can extend the lifespan of your countertop and maintain its aesthetic appeal. Following the expert-backed solutions provided in this guide, you can tackle these repairs with confidence and ensure your kitchen remains functional and beautiful for years to come.